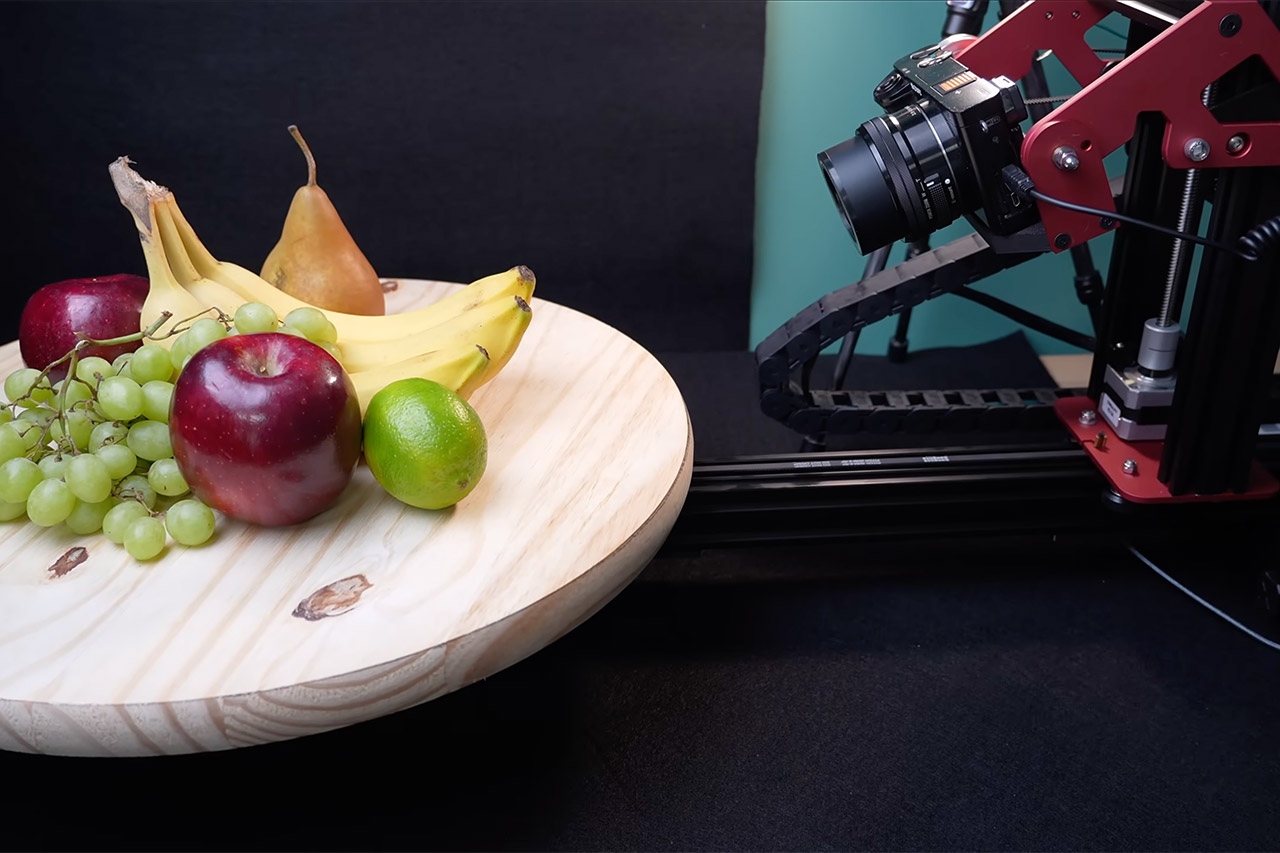
Ben from Ben Makes Everything had an old Ender 3 3D printer accumulating dust in his closet. So, he came up with an ingenious idea: turn this dusty machine into a cinematic marvel. More specifically, a robotic camera rig to capture smooth video and scan objects to create 3D models.
Ben’s quest began with a photogrammetry setup, which collects many photographs of an object from different angles and patches them together to form a 3D model. His Ender 3 had precision stepper motors and a configurable G-code system. Printers move in three axes—four if you count the extruder—so why not repurpose those mechanics to move a camera?

ELEGOO Neptune 3 Pro 3D Printer, Quick Assembly with Auto Leveling, Direct Drive Extruder, PEI Flexible...
- Reliable Printing with Ideal Build Size: ELEGOO Neptune 3 Pro offers a standard 225x225x280 mm/8.85x8.85x11 inch build volume, ideal for daily...
- Powerful Direct Drive Extruder: The Neptune 3 Pro features a dual-gear direct drive extruder with a 3:1 gear ratio, built from durable SUS303...
- Smarter Printing, Less Worry: ELEGOO Neptune 3 Pro includes 36-point auto bed leveling, making setup effortless while ensuring a perfect first layer....
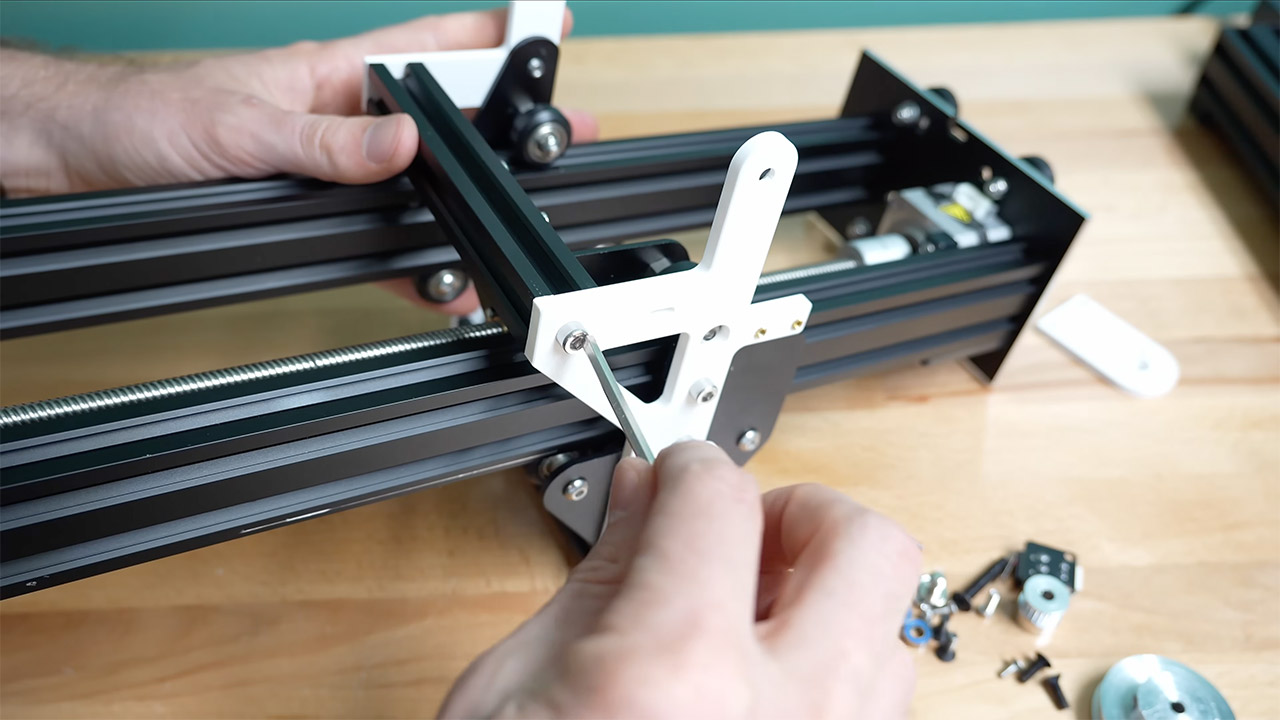
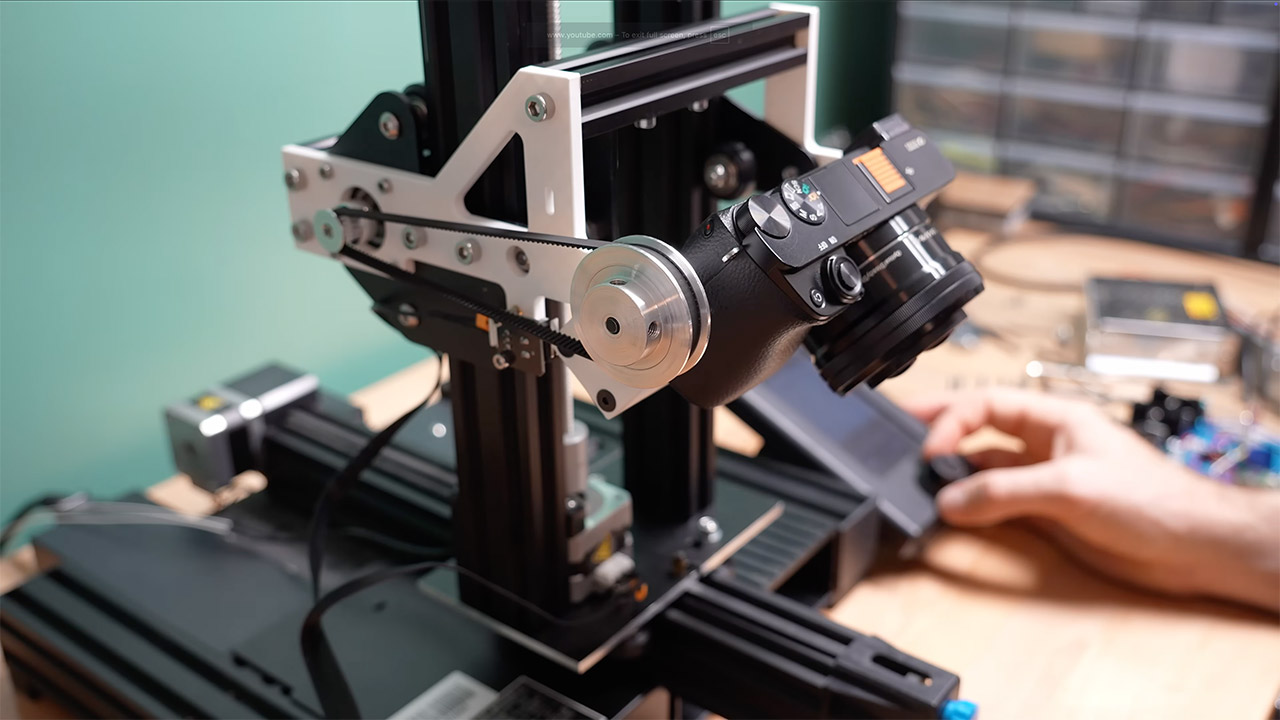
The camera rig needed to move in multiple directions: tilt up and down, slide forward and backward, and adjust vertically. Ben started with the tilt mechanism, originally the X-axis, which moved the print head side to side. He designed a U-shaped bracket to hold the camera and linked a 60-tooth pulley to the motor via a smaller pulley for smoother motion and increased torque. This meant it was able to tilt a full 180 degrees.
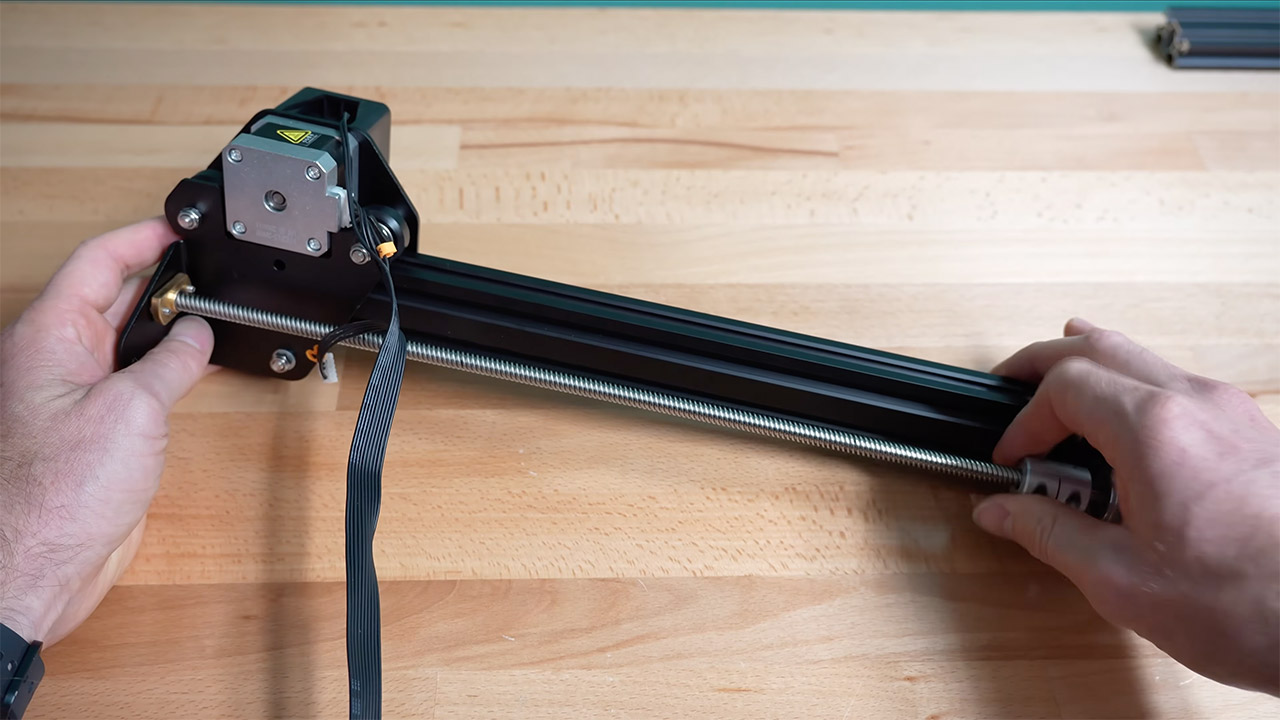
For vertical movement, Ben repurposed the Z-axis, which originally raised and lowered the print head. The Ender 3’s dual 2040 aluminum extrusions were the tracks, guided by V-shaped wheels and a lead screw driven by a stepper motor. To handle larger objects, he extended the Z-axis with longer rails and a new lead screw, but ran into a problem when the new screw’s thread pitch did not match the old brass nut. A straightforward fix was to drill new holes to mount the correct nut.
The Y-axis, which moves the camera forward and backward, needed an upgrade too. The original 4040 extrusion only had 220mm of travel – not enough for Ben’s needs. He replaced it with a 750mm extrusion, and paired it with a longer GT2 belt, cut and crimped with brass bands. The original tensioning system worked perfectly. Despite concerns about the belt-driven system handling the weight of the camera, tests showed it worked great and he didn’t need a linear rail setup.
The most ambitious part of the project was the rotational axis. Ben originally planned an 18” bearing ring to spin the camera around the object. He envisioned a long metal arm extending from the ring, holding a motorized cart that could move the camera in and out and up and down. Driving the ring proved tricky – friction wheels would slip and machining a custom internal gear was beyond his tools and budget. After some thought, Ben flipped the concept: instead of moving the camera, he’d rotate the object on a turntable.
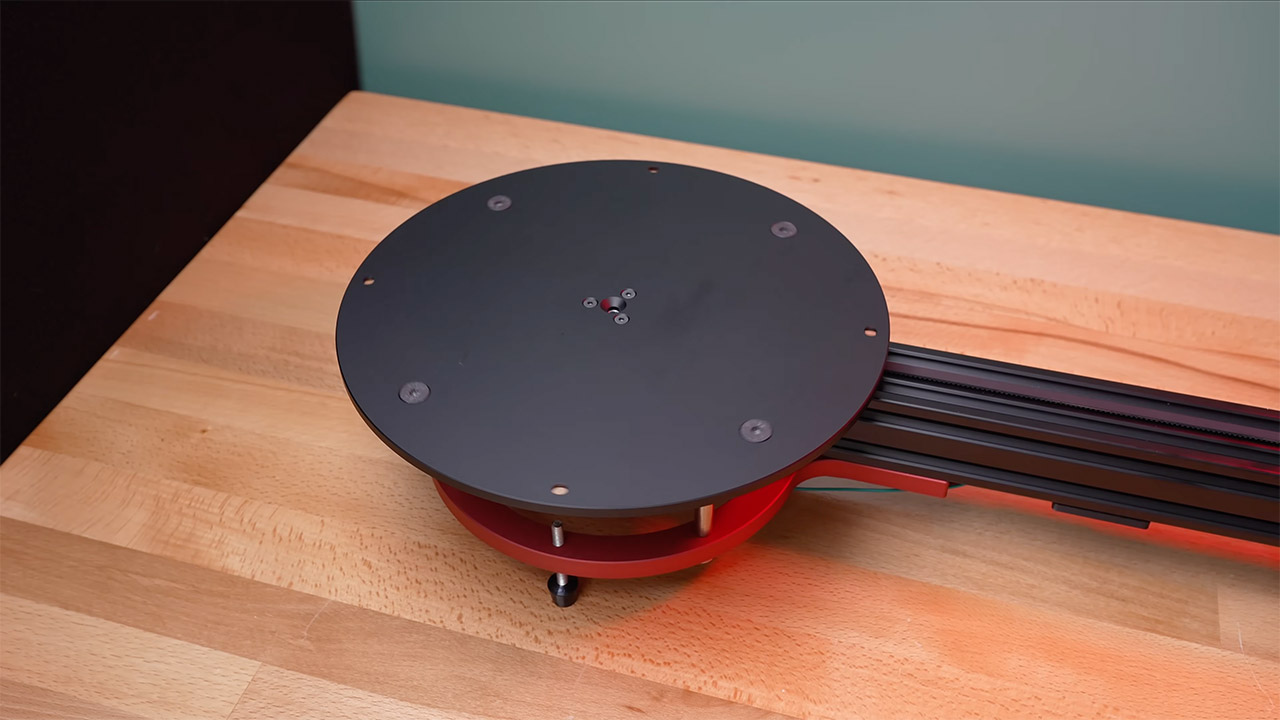
The turntable was powered by the printer’s extruder motor, now repurposed to spin a platform via a 60-tooth pulley and a 20-tooth gear. Ben designed a sturdy base with adjustable standoffs and bearings to ensure smooth rotation, even under the weight of larger objects. The turntable could handle up to 18” in diameter, making it good for scanning household items like vases or small sculptures. To add rigidity and polish, Ben had several parts CNC-machined in metal by an outside service, but noted that high quality 3D printed parts would work just as well for those on a budget.
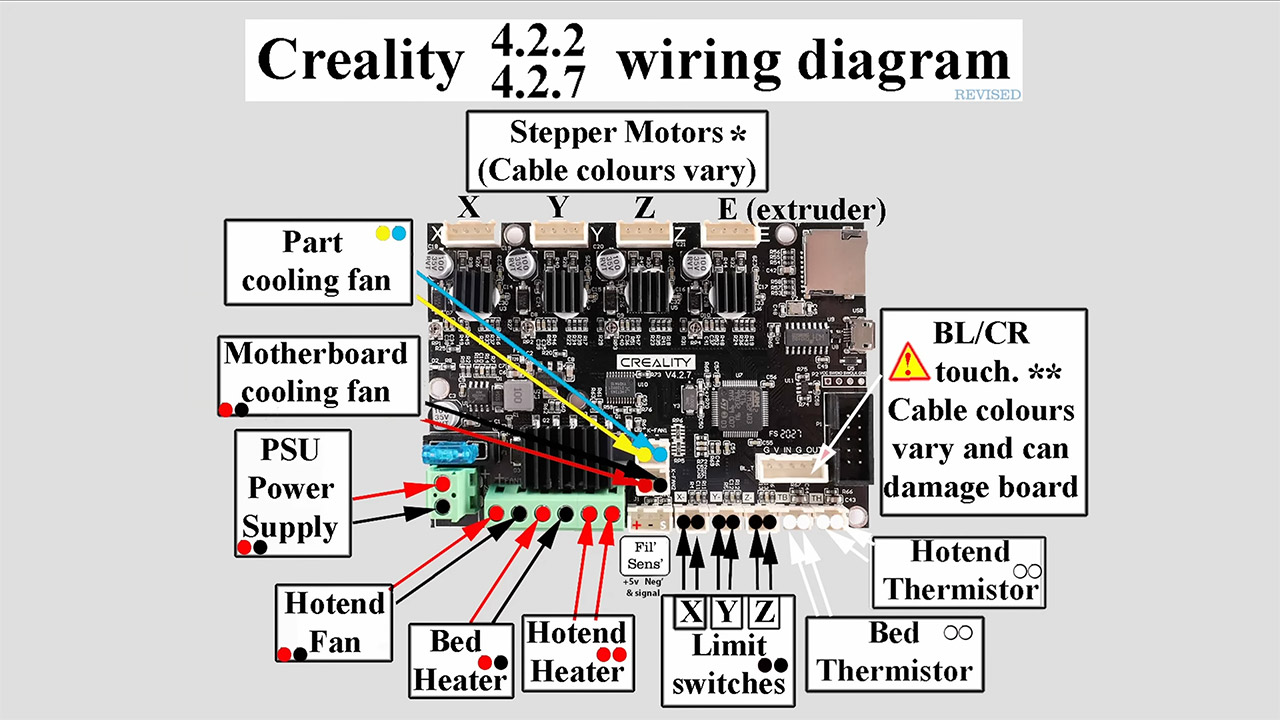
The Ender 3’s mainboard, under the printer’s frame, had four motor drivers – perfect for the rig: X-axis for tilt, Y-axis for forward-backward motion, Z-axis for height and the extruder driver for the turntable. Limit switches for precise homing and a micro switch for the tilt axis. Ben ran wires to the new components, kept it clean with a cable chain and a custom 3D printed bracket for the control screen.
Ben then adjusted the Y and Z-axis soft limits to match their extended ranges and recalibrated the X-axis (now tilt) to prevent over-rotation. The turntable’s steps-per-unit setting gave him a headache – it only rotated two-thirds of the expected distance – until he realized he needed to clear the printer’s EEPROM with a specific G-code command. For control he used Pronterface, a program that sends G-code over USB or via an SD card, and wrote Python scripts to automate movements, especially for photogrammetry.
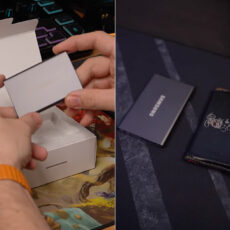
Capturing stills for 3D scanning required an automated shutter trigger. Ben repurposed a 5V signal pin from the mainboard’s BL Touch connector, originally for a bed-leveling sensor, to send signals to his camera. To protect his expensive gear he used an Arduino and two mechanical relays – one to focus, one to snap the photo – ensuring electrical isolation. The relays, overkill for the 3.3V signal, added a charmingly robust touch to the setup. A 3D-printed box housed the relay system and rubber feet bolted to the turntable prevented wobbling.
The final rig is a beast, taller than expected to fit large objects. It has 600mm of forward travel, 500mm of vertical movement and 180 degrees of tilt, all while being smooth and vibration free for crisp footage.
[Source]