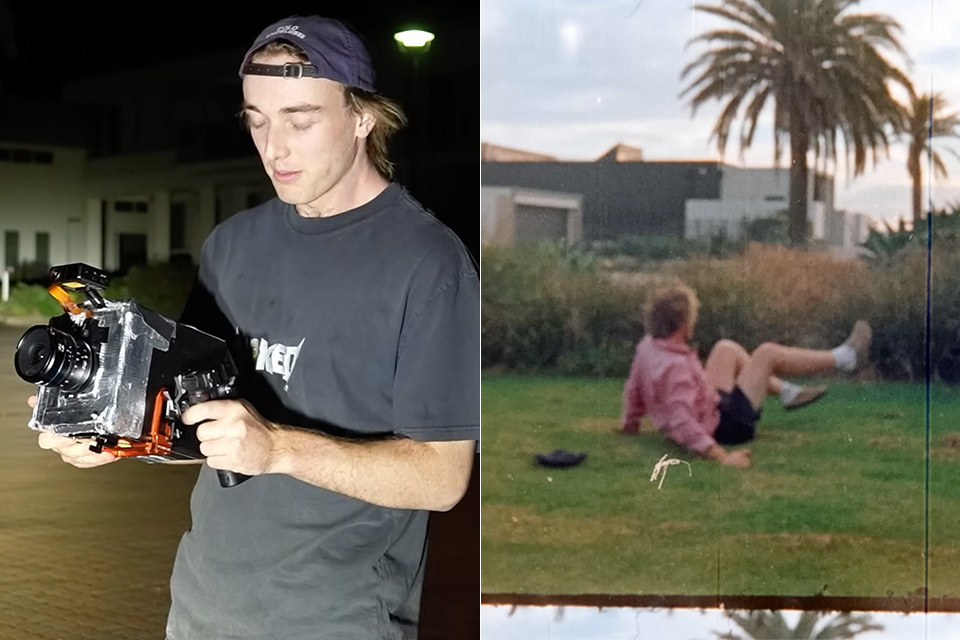
Henry Kidman thought to himself, ‘why not try building a 16mm motion film picture camera from scratch?’, and went about it using only a 3D printer, an Arduino, and a stubborn refusal to accept that there are some things that just might be too difficult to get done alone. His project shows what’s possible with the tools most of us already have on hand, and what he came up with is a device that against all the odds, actually captures good quality film footage.
Things got underway with a decision – will it be a digital or a film camera. Now digital cameras are the easier of the two to build, you get instant feedback and it’s cheaper, but film is a whole different ball game – the image quality is all down to the type of film you bought from Kodak – and so Henry was able to focus on creating a “light-tight box” that moves the film precisely at the right times to expose it to light. He went with 16mm film, which is a bit more affordable than the likes of 65mm IMAX or even 35mm, and can produce really rich, cinematic images.

- High-Speed Precision: Experience unparalleled speed and precision with the Bambu Lab A1 Mini 3D Printer. With an impressive acceleration of...
- Multi-Color Printing with AMS lite: Unlock your creativity with vibrant and multi-colored 3D prints. The Bambu Lab A1 Mini 3D printers make...
- Full-Auto Calibration: Say goodbye to manual calibration hassles. The A1 Mini 3D printer takes care of all the calibration processes automatically...
Getting film to move through a camera might sound straightforward, but as Henry soon found out- it’s all about mechanical engineering. Traditional 16mm cameras have been doing this since the 1920s using a claw to pull the film through one frame at a time via perforations, with a brief pause to take a picture. Henry however decided to take a different approach. He opted for a 3D-printed sprocket, which is driven by a stepper motor that’s controlled by an Arduino – this then makes the sprocket spin to advance the film frame by frame and stopping completely each time for each exposure. The motor has to be really precise – it needs to be doing this 25 times per second if the film is going to move at the standard film speed. You can see how elegant it looks in slow motion – film halts, shutter spins and the whole process repeats with amazing accuracy.
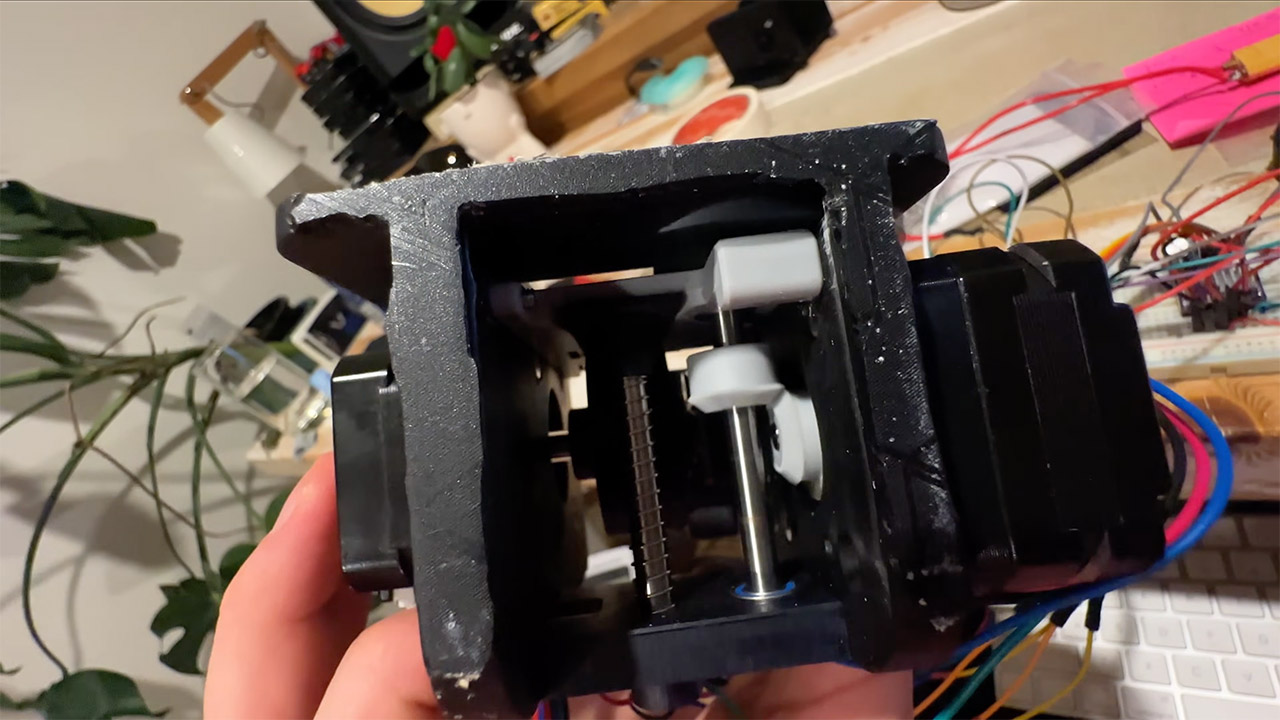
But precision only goes so far – the sprocket was made from plastic and warped a bit under the strain of being used a lot. This made the frames get out of alignment, which when you look at the film, ends up looking shaky. Henry’s solution to this was pretty clever – he started post-processing the film and tracking the gate’s position to digitally correct for the misalignment. He added something to the gate so the scanner could adjust for each frame’s position – which ended up stabilising the footage. It shows what a great thinker Henry is, to come up with a way to get around the limitations of 3D-printed materials and still keep his vision intact.
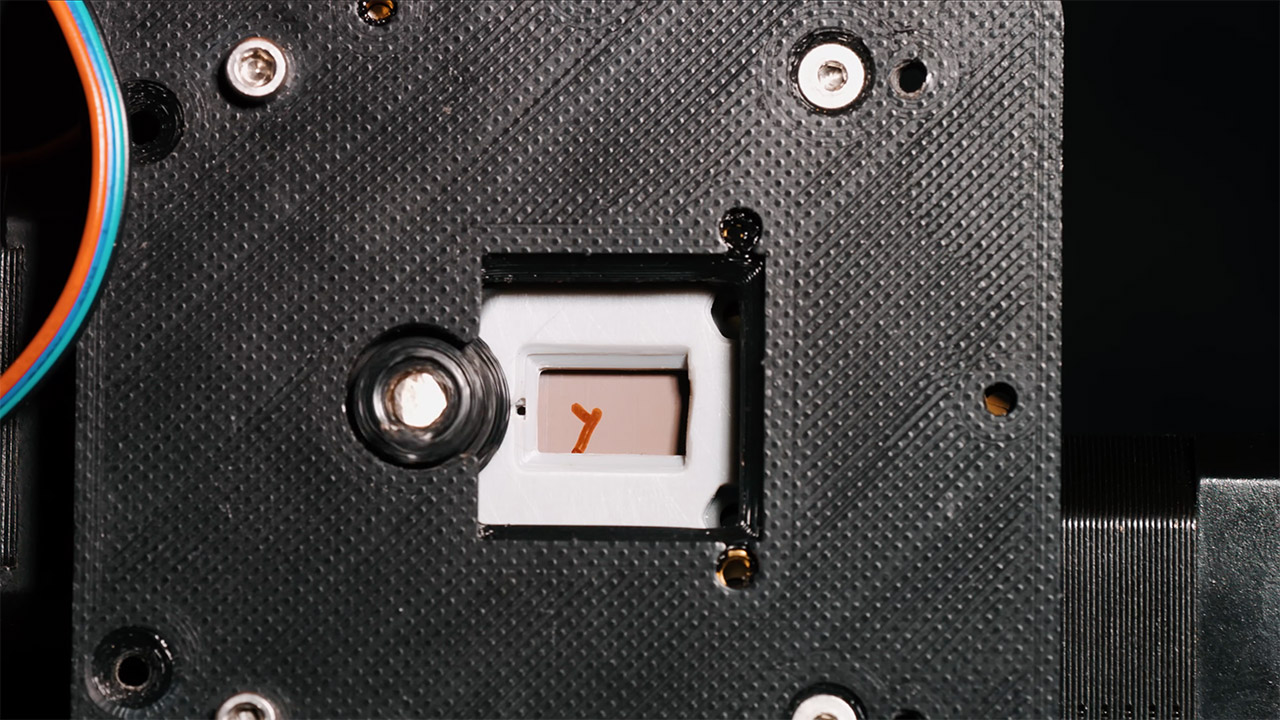
Getting the light to the right place is another story altogether. A film camera has to shield the film from all light except during exposure. Henry’s first 3D-printed parts were made from UV-curable resin, which were a tiny bit translucent – so light was seeping through and fogging the film. So he coated it with silver metallic paint and then a layer of black paint – just to make sure light wasn’t bouncing back – and then even went so far as to line the gate and shutter assembly with black felt, which is way better at absorbing stray light than plastic alone.
Focus was a significant difficulty because with a film camera, the distance between the lens mount and the film plane, known as the flange focal distance, must be just precise. For Kidman’s Sony E-mount lenses, that distance is 18mm – but it has to be perfect – and he could only tolerate a tiny fraction of a millimeter tolerance. His initial measurements revealed that the spacing was off by 0.11mm, which was too little to fill with ordinary shims. So he began feverishly scouring online forums for any type of advise he could obtain, and he discovered a slew of people who felt the idea of a 3D-printed camera was a complete joke. But Kidman is not one to be deterred; he just opted to improvise. Using printer paper and a vinyl cutter, he and a “very little” piece of something else were able to bridge the distance.
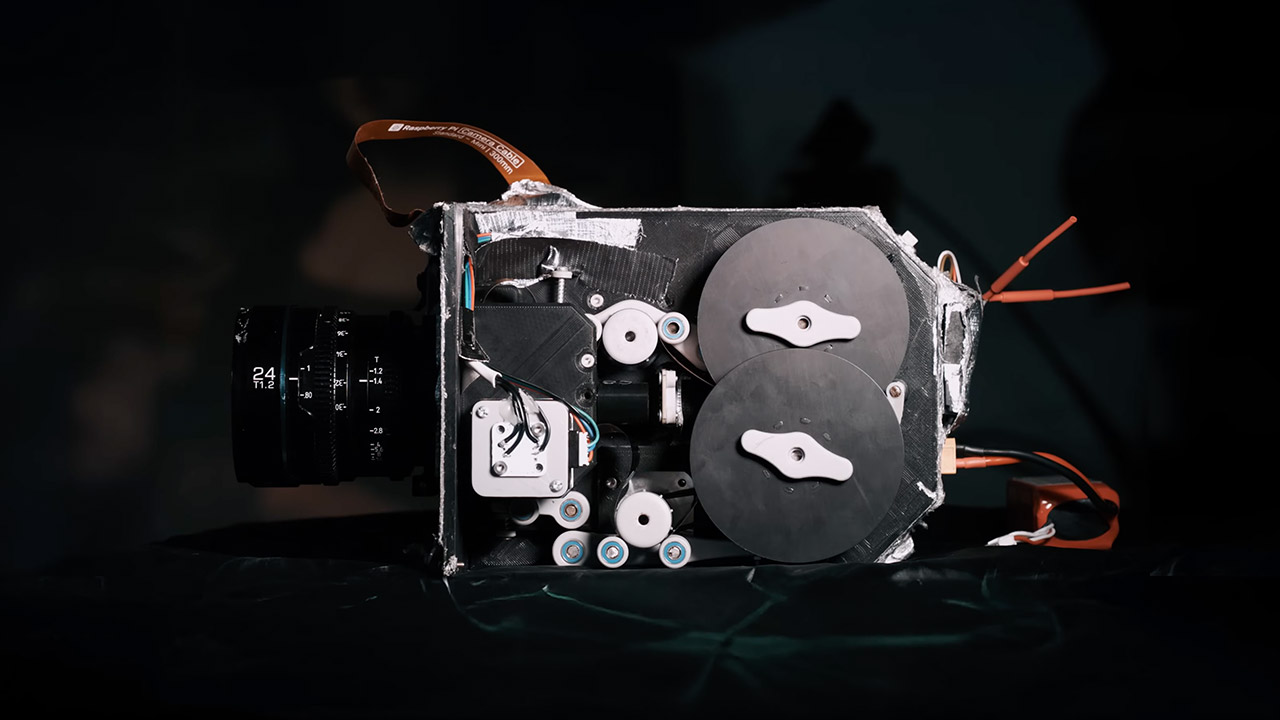
The camera’s shutter – another bit of kit driven by a stepper motor – is basically a rotating disc that blocks light while the film is moving along , making sure each frame is captured as a nice sharp image . But synchronising the shutter with the film movement was a real headache – the stepper motor was already running flat out trying to move the film at the required speed , & if he pushed it any harder it was going to start missing steps . Kidman’s solution was to fine-tune the timing using the Arduino, so the shutter only opened when the film was completely still.

Kidman’s final test involved posting a sample of footage made with his camera on a film enthusiast forum, saying it was shot with a $17,000 professional camera owned by Tyler, the bloke who had been mocking 3D-printed cameras. His footage passed with flying colors, demonstrating that a 3D-printed camera could hold its own against the big boys.
[Source]