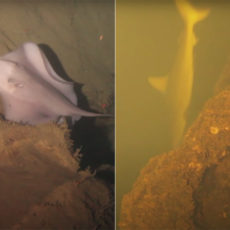
Max Imagination’s ESP-DIVE submarine puts underwater exploration within reach for casual hobbyists for just $125. This is a fully functional, first-person-view (FPV) remotely operated vehicle (ROV) you can build with off-the-shelf electronics, 3D-printed parts and some elbow grease.
A 288mm long and 48mm wide clear acrylic pipe forms the submarine’s hull, housing the electronics and keeping the water out. Sealing this tube is critical and Max uses rubber O-rings and superglue to make sure no leaks get through even at 5 meters depth. Two end caps, one flat and one domed for the camera, secure the hull, with 3D printed parts designed in Autodesk Fusion for a snug fit. These caps, printed in durable PLA or water resistant PETG filament, hold everything together and support the mechanical components. To combat the unforgiving nature of water Max advises coating 3D printed parts with superglue to seal porous surfaces and adding dielectric grease to O-rings for extra protection. A custom 3D printed pipe cutter ensures the acrylic tube is cut precisely, no jagged edges that could compromise the seal.

- 【16K Magic, Precision Redefined】Designed to capture the finest details for exquisite models, ELEGOO Saturn 4 Ultra 16K Resin 3D Printer boasts...
- 【Smart Tank Heating, Flawless Prints at 30 °C】ELEGOO Saturn 4 Ultra 16K 3D Resin Printer features an intelligent tank heating system that...
- 【New AI Camera with Light for All-Day Monitoring】The AI camera offers real-time monitoring and instant alerts for empty build plates and warped...
Buoyancy control is what sets this project apart, achieved with a pair of syringe based piston ballasts. Each piston is driven by an N20 micro-geared motor and a rack-and-worm gear system and draws in or expels water to adjust the depth. One piston is at the front, the other at the rear, balancing the 608 gram vessel for smooth dives and ascents. Fixed ballast comes from quarter-ounce iron wheel weights, 8 in the front and 8 in the back, with additional external weights wrapped in heat-shrink tubing to prevent rust. These can be fine tuned for fresh or saltwater where buoyancy is different. During testing Max noticed the sub tilting slightly tail heavy, so he redistributed the weights – 3 in the front right, 2 on the battery and a couple on the rear piston – to keep it level.
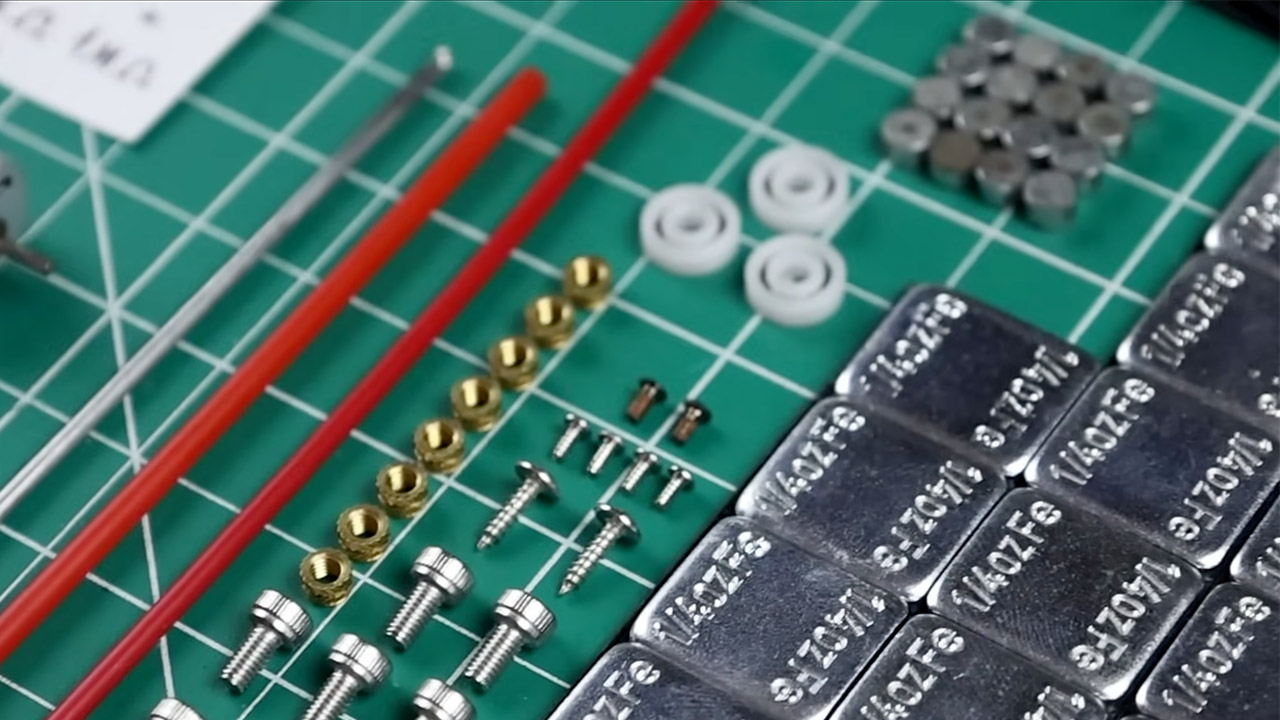
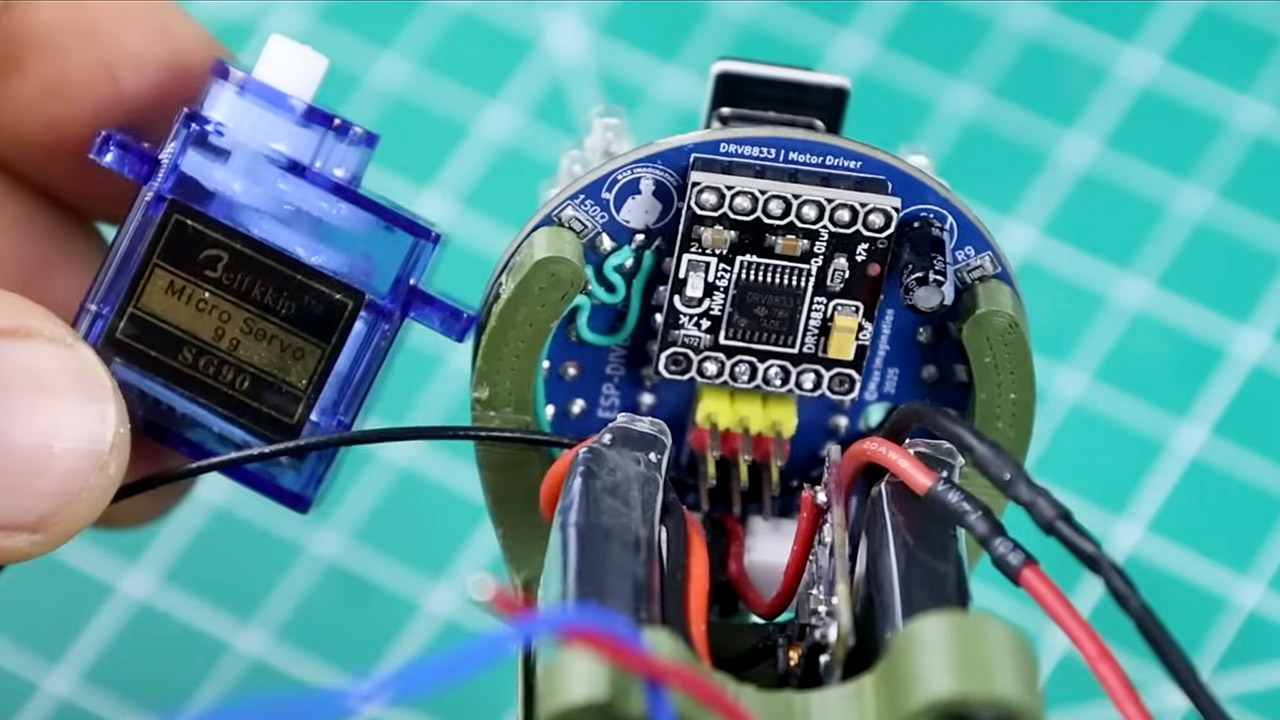
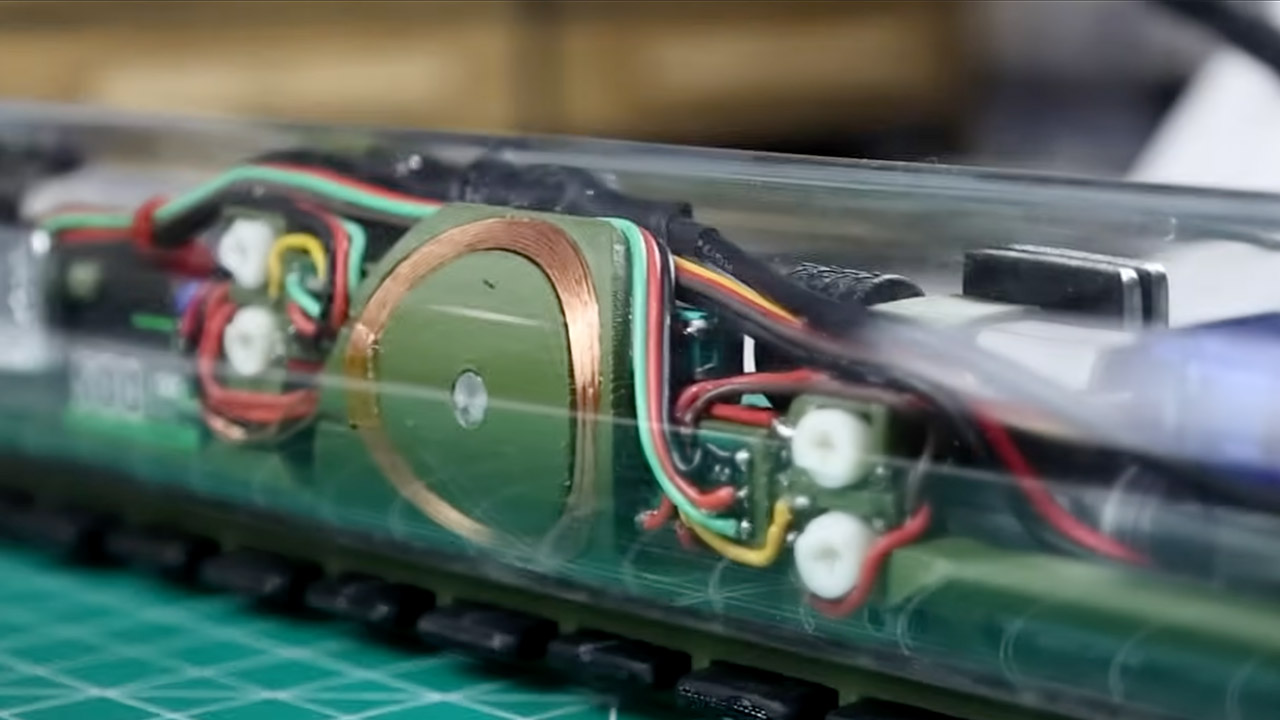
Propulsion and steering is done with a magnetic coupling system, keeping the motors dry inside the watertight hull. A high power brushed motor drives the propeller through a magnetic drive coupling, with a plastic ball bearing to prevent friction from the magnets pull. The propeller shaft is made from a 2.4mm spray can straw to prevent rust, and spins freely to achieve a top speed of 0.5 meters per second. Steering is done with a 9-gram servo motor controlled rudder, also using magnetic couplings to translate the motion through the hull. These couplings have 5x3mm neodymium magnets in alternating polarity to ensure reliable power transfer without breaching the hull’s seal. Superglue is used to seal the magnets to prevent corrosion, especially for parts that are exposed to water.
At the heart of the ESP-DIVE is the Seeed Studio XIAO ESP32S3 Sense – a teeny board that does pretty much everything for this underwater sub. This little guy handles all the Wi-Fi controls, live video streaming, onboard SD recording and keeping an eye on the battery – pretty much all the heavy lifting for this little sub. The 3-megapixel wide-angle camera mounted behind that fancy domed front cap delivers a crystal clear FPV feed with almost no lag – which is essential for navigating underwater. On top of that the board comes with a web interface which lets you control the thrusters, rudders, ballast and headlights right from your smartphone – and show you a live feed at the same time.
To get everything up and running, you need to program the ESP32S3 – which is a bit of a long way round but you can do it with the Arduino IDE and some code from a GitHub repository by s60sc. Max has tweaked the code to sort out things like motors and even a flashing headlight that lets you know when the battery is running low (it switches on when the voltage drops below 3.5V). Storage wise you’ve got a 4GB microSD card which holds onto your Wi-Fi passwords and video footage in AVI format – all neatly organised so you can just pop it into a player and go.
Getting all that fancy electronics looking tidy requires a custom PCB – which Max designed to fit inside the sub’s hull – and it all came in at a very reasonable $2 from JLCPCB. That board is the brain of the operation and includes a smart power switch, a bidirectional motor driver for the propeller and all the connectors you need for the servo, pistons and headlights. Putting it all together means soldering in all the little surface mount bits like resistors and MOSFETs and then adding the bigger through hole parts like headers and a JST battery connector.
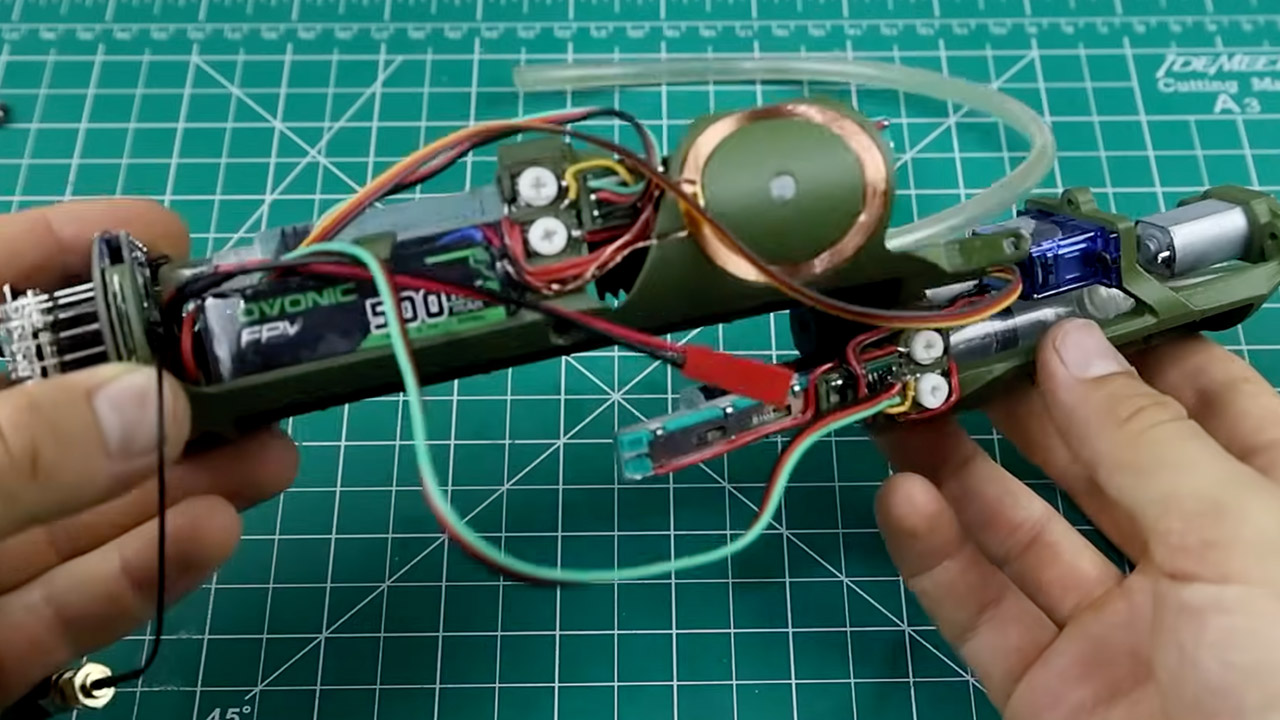
Under the hood (or rather under the sub’s hull) you’ve got two 500mAh 3.7V LiPo batteries wired up to last about half an hour per charge. And there’s a nice little bonus in the form of a wireless charging coil and a clip on charger you can just stick on the side of the sub – you just have to be prepared for it to take 8 hours to charge up – compared to 1.5 hours with a direct LiPo charger.
Now one of the biggest challenges underwater is actually getting a Wi-Fi signal – because radio waves just don’t cut through the water that well. Max sorted that problem with a 5-meter coaxial cable that hooks up to a floating buoy – made out of polystyrene with a nice chamfer on the edge to keep it steady. The buoy keeps the antenna bobbing about at the surface where it can get the signal – and you get a nice 50-meter control range out of it. The app on your phone lets you tweak all the settings with simple sliders for propeller speed, rudder angle and ballast – so you can get the sub neutral buoyancy, dive down or swim up all with a few finger twitches.
Assembling the ESP-DIVE is a bit of a hands on project that involves everything from 3D printing to soldering and making sure it all stays water tight. The Elegoo Neptune 4 Plus printer is the workhorse that turns out the sub’s parts in batches – and you need to get all the settings just right – like brim mode for adhesion and supports to hold things up where they need to be. If you’re printing any of the mechanical bits like the propeller and gears you need to slow things down a bit to make sure they come out nice and strong.
Getting the parts out of the printer and ready for assembly might be a fiddly process, but it’s worthwhile in the end. And, as Max discovered, it’s not all easy sailing; he had a few snags with the initial batch, which leaked. The problem was fixed by resealing the 3D printed pieces and adding some silica gel packets to absorb up any water that might try to sneak in via the front bubble.
[Source]