Photo credit: There Oughta Be
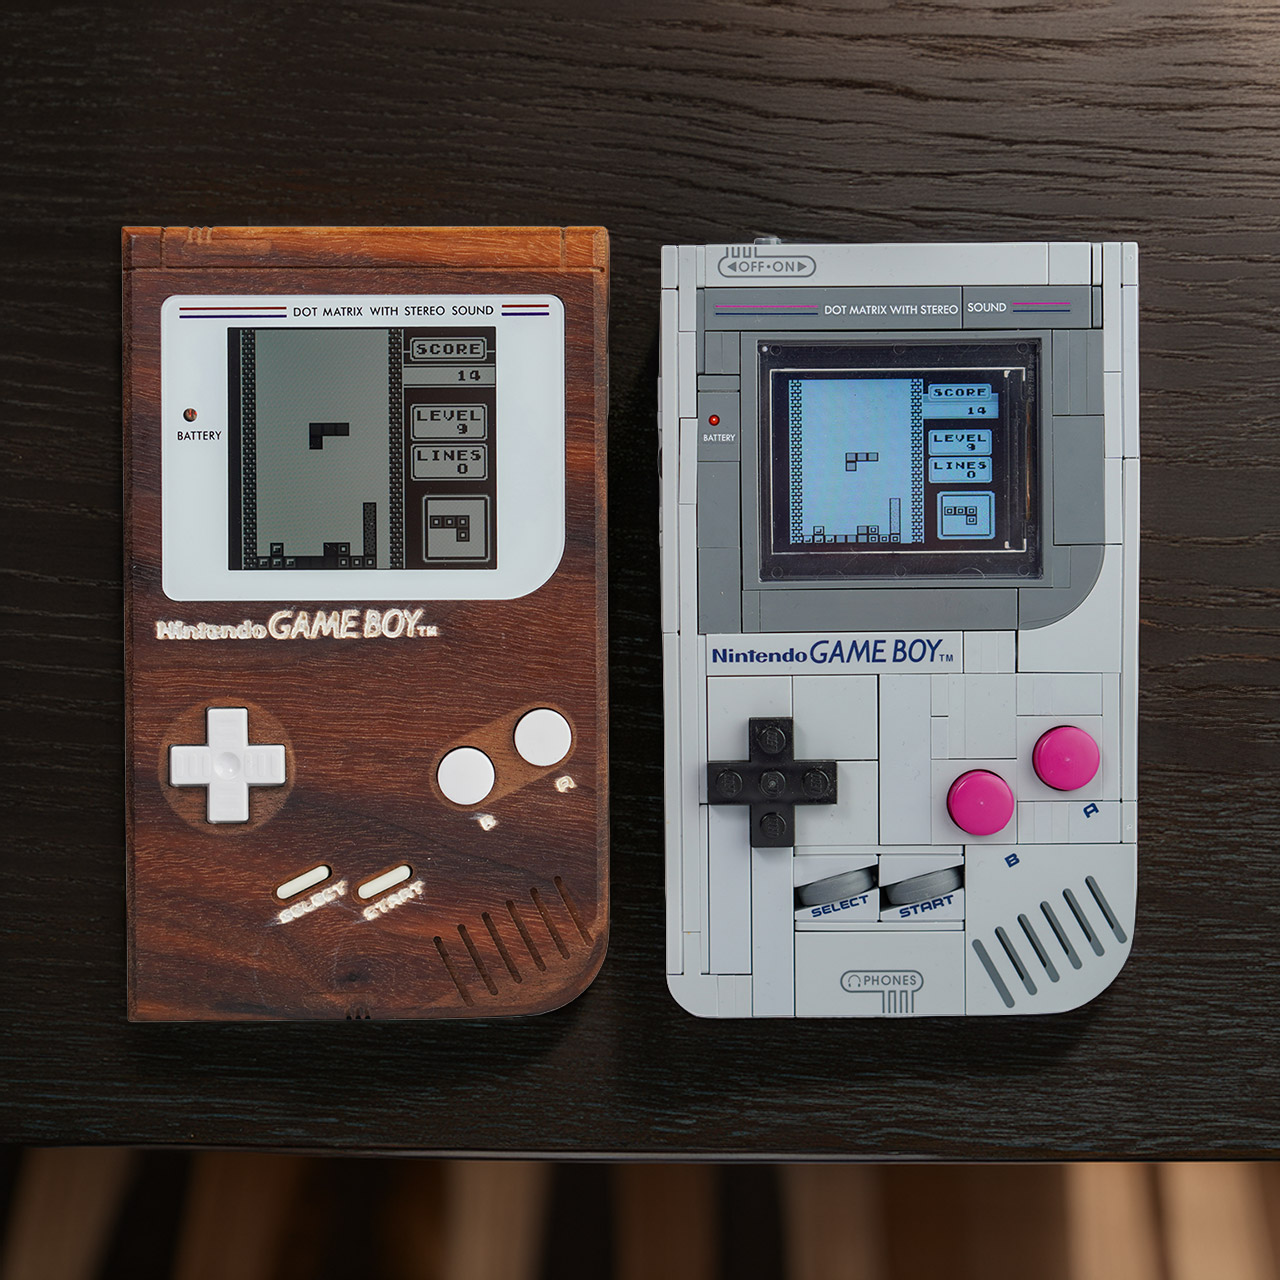
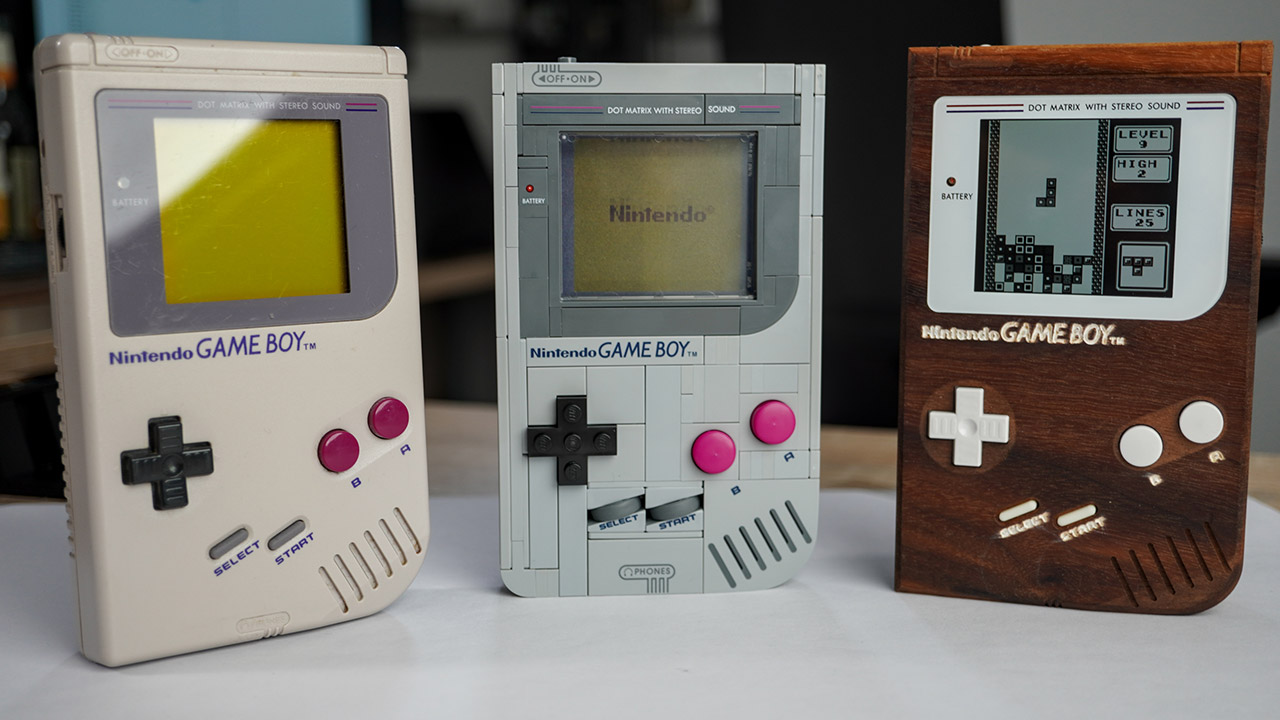
The LEGO 72046 Game Boy set was introduced earlier this month, and many builders were satisfied with simply snapping together the 1,073 pieces to create a lifelike handheld. The device retains the clunky charm of the 1989 original, right down to the d-pad and A/B buttons, and features lenticular inserts that resemble a flickering screen from games like Tetris. But Sebastian L., the tinkerer behind the website There Oughta Be, wanted his LEGO Game Boy to play real games with a luminous screen in the 6×6-stud window.
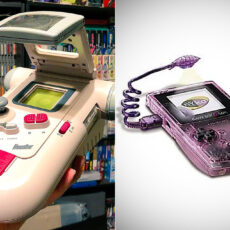
Sebastian’s design is inspired by his earlier handcrafted wooden Game Boy, which has a crisp IPS screen that casts new light on vintage games. When LEGO announced the set months ago, he immediately pre-ordered, visualizing the two side by side. However, as assembly day arrived, the contrast gnawed at him: the wooden model’s dazzling brilliance would outshine the Lego version’s printed illusion. But for Sebastian’s build, those inserts seemed more like a whisper than a roar. A actual screen would even the score, allowing the Lego masterpiece to stand out while remaining faithful to the product.

- BUILD AN ICON – Build the ultimate retro gaming display with the LEGO Game Boy (72046) model kit for adults ages 18 and up
- RELIVE THE EXCITEMENT – Remember powering up your Game Boy for the first time? Experience the thrill again with this authentic of the handheld...
- DISCOVER AUTHENTIC DETAILS – The instantly-recognizable Game Boy features classic button layout, contrast dial, and interchangeable Game Pak and...
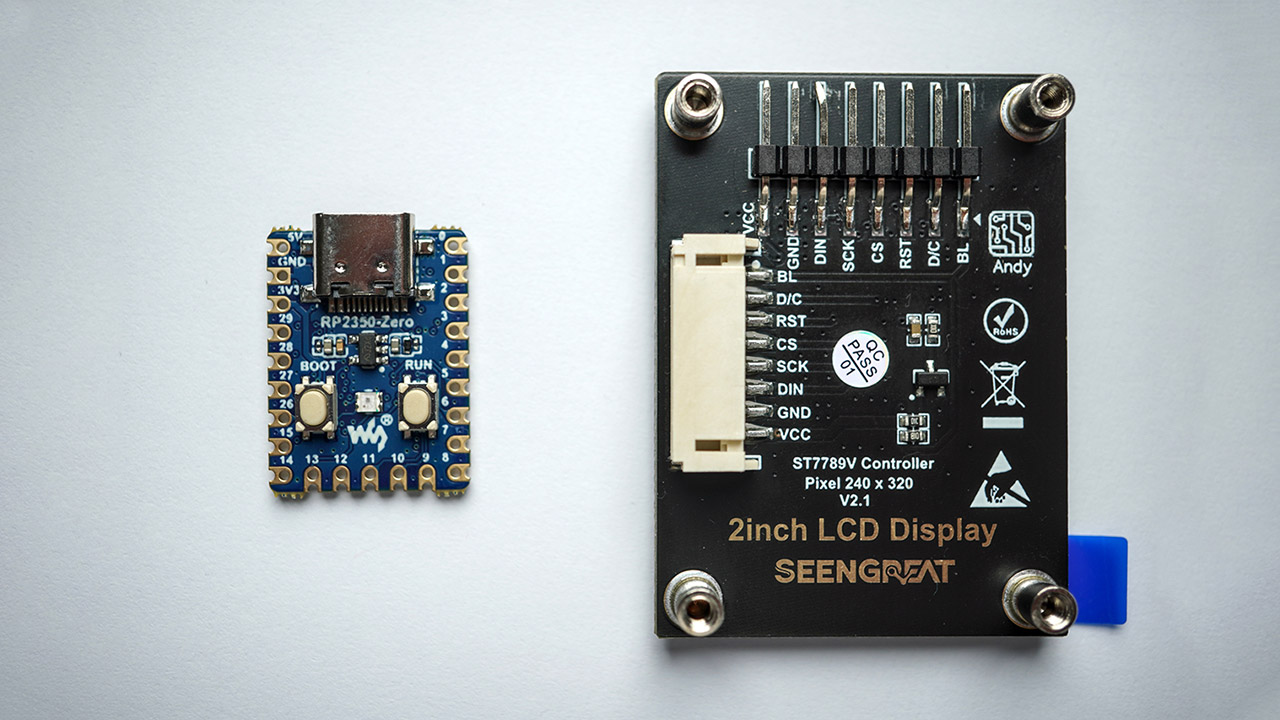
Preparation began with measurements taken from the LEGO promotional photos. Sebastian demonstrated that the display cutout is 6 studs square by raiding his boys’ brick bin for a replacement frame. He then looked through the ads for a small LCD that wouldn’t take up much space. His recommendation: a 2-inch, 320×240-pixel Seengreat panel connected via SPI to a ST7789V controller. It’s a generic module that costs less than $10, and the critical specifications are the same: it’s tiny enough to fit in the window and has solderable pin headers. It’s connected to the Raspberry Pi RP2350-Zero, a CPU the size of a thumbnail with a USB-C port for charging and updating. The total cost is roughly 25 euros if you have basic tools like a soldering iron. No 3D printer required, though Sebastian whipped up a printable frame to center the screen.
Assembly follows LEGO instructions with precision, except instead of plastic, solder is used. Start with the full 72046 build intact—Sebastian skips that in his video and goes straight to the mod. Remove the lenticular holder, a few clips and the bricks that give up without a fight. The LCD’s 8 pins must be carefully wired to the RP2350: ground to ground, 3.3-volt power to power and the rest to flexible GPIO lines for data. Sebastian bends the screen’s existing headers up and stacks the microcontroller on top of them for 6 direct solder joints; short jumper wires connect the power pair. It’s a clean build with minimal wiring but requires a steady hand—one bent pin in his pictures is a realistic warning. Slide the screen into the adapter frame which passes the ribbon cable through a notch for clearance. Nest the whole thing into the window and route a USB cable out. Sebastian puts his into the model’s fake AC adapter slot, a nod to the original’s power inlet, though thicker plugs may snag. The leftover space inside the chassis swallows the whole setup whole leaving the exterior untouched.
Sebastian avoids video loops for authenticity, instead relying on a full Game Boy emulator built into the RP2350 firmware. His journey begins with Peanut-GB, an open-source core that was adapted to Raspberry Pi processors and forked by developers such as deltabeard, YouMakeTech, and tobigun. The most recent version enhances display compatibility, including the ST7789V panel. Sebastian’s patch removes button inputs, relocates them to an unused GPIO, and transforms colors to grayscale to match the original monochrome display.

Power is now via USB but the setup begs for expansion. The emulator handles audio output and GPIO controls so battery packs and button contacts are included in the bricks. Making reliable switches from LEGO nubs would be a challenge for anyone—Sebastian says it’s difficult but doable for those who want a playable handheld.